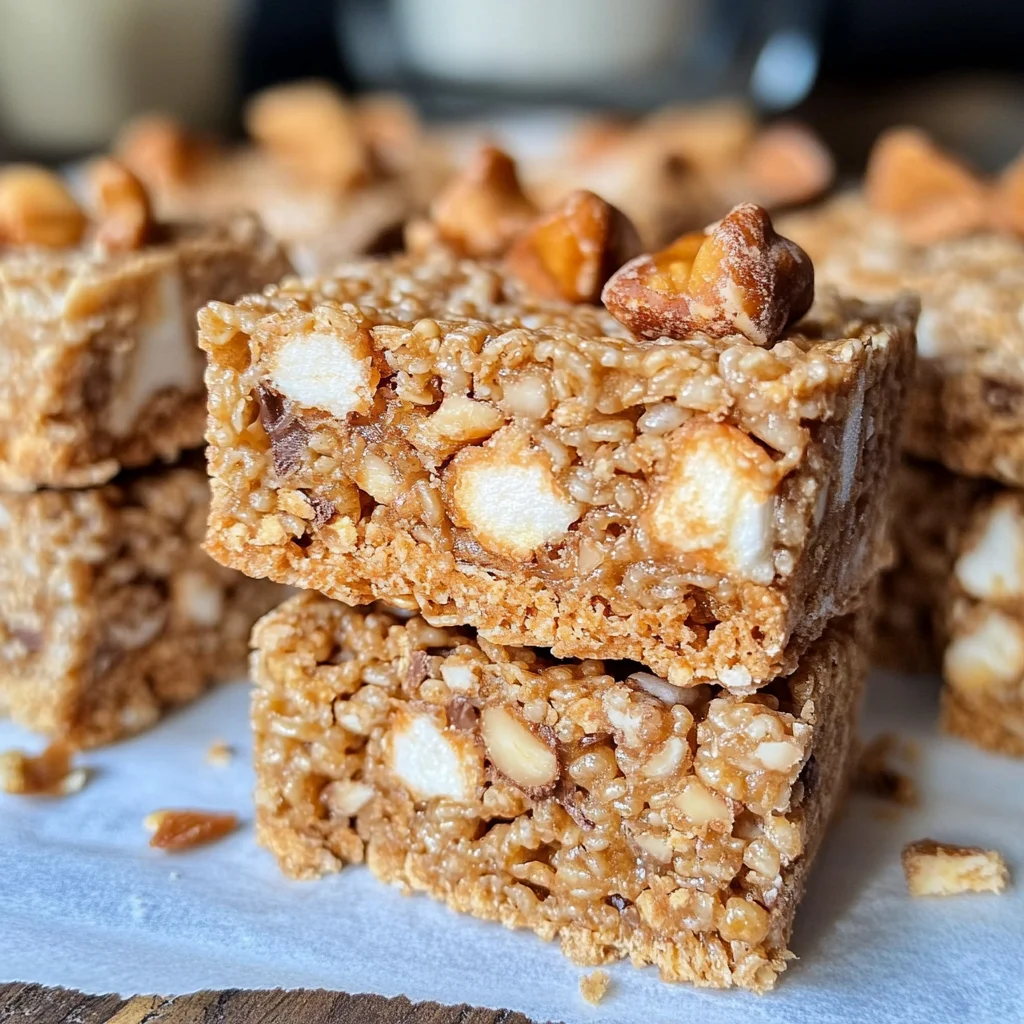
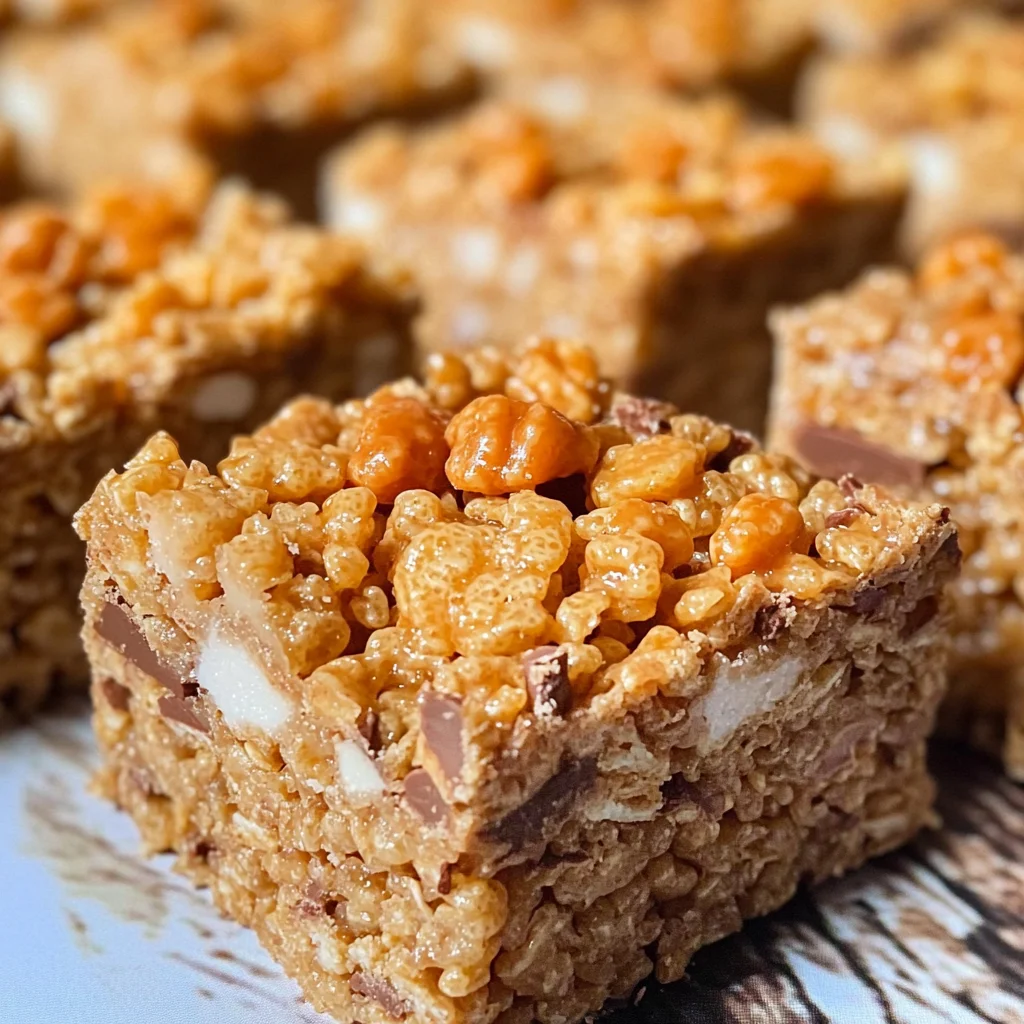
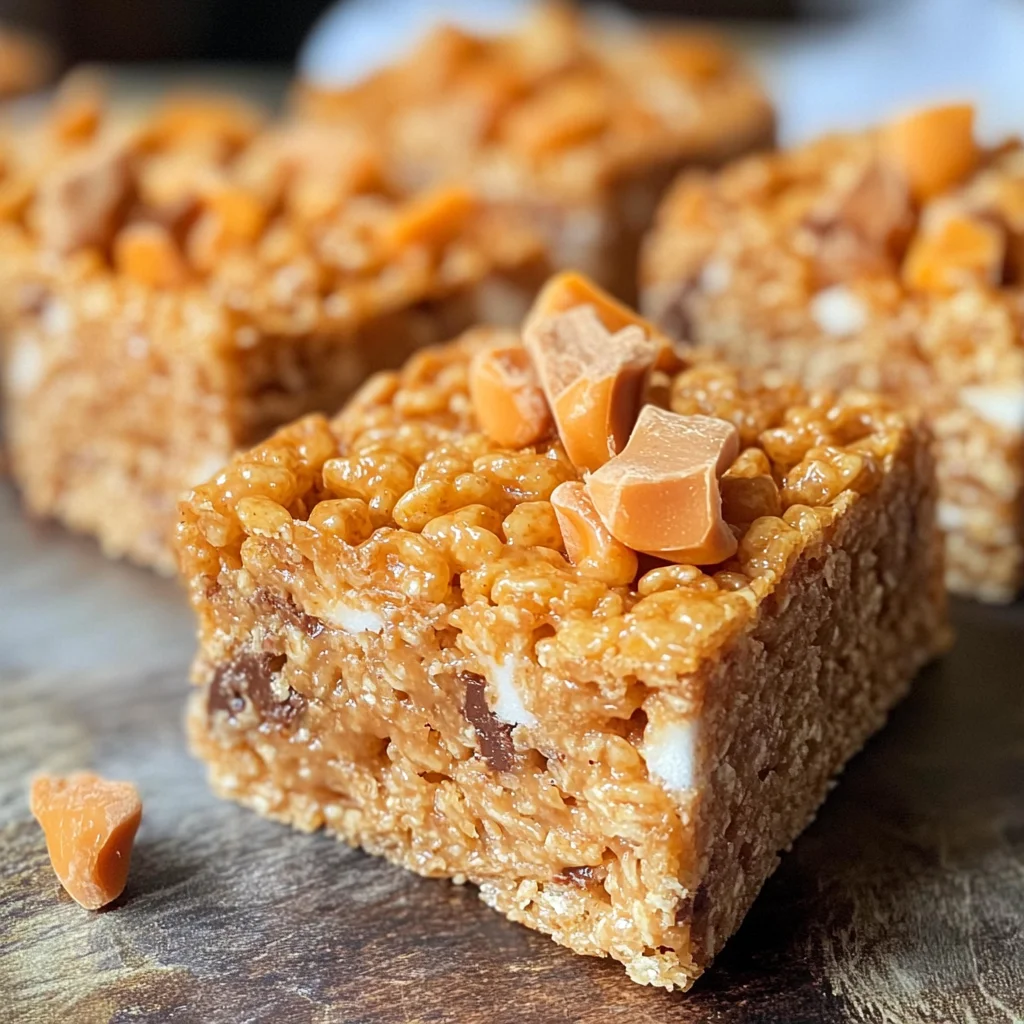
Butterfinger Rice Krispie Treats are an irresistible combination of crispy cereal and creamy sweetness, enhanced by the delightful crunch of Butterfinger candy bars. Perfect for parties, family gatherings, or a simple afternoon treat, these no-bake bars are easy to make and sure to satisfy your sweet tooth. The blend of peanut butter and chocolate flavors makes this dessert stand out, ensuring it becomes a favorite for both kids and adults alike.
Jump to:
- Why You’ll Love This Recipe
- Tools and Preparation
- Essential Tools and Equipment
- Importance of Each Tool
- Ingredients
- For the Base
- For the Crunch
- How to Make Butterfinger Rice Krispie Treats
- Step 1: Prepare the Baking Dish
- Step 2: Crush the Butterfingers
- Step 3: Melt the Mixture
- Step 4: Add Peanut Butter
- Step 5: Combine with Butterfingers
- Step 6: Mix in Rice Krispies
- Step 7: Transfer to Baking Dish
- Step 8: Cool Completely
- How to Serve Butterfinger Rice Krispie Treats
- With a Side of Ice Cream
- Drizzled with Chocolate Sauce
- Topped with Whipped Cream
- Served with Fresh Fruit
- How to Perfect Butterfinger Rice Krispie Treats
- Best Side Dishes for Butterfinger Rice Krispie Treats
- Common Mistakes to Avoid
- Storage & Reheating Instructions
- Refrigerator Storage
- Freezing Butterfinger Rice Krispie Treats
- Reheating Butterfinger Rice Krispie Treats
- Frequently Asked Questions
- Can I use different candies in Butterfinger Rice Krispie Treats?
- How do I keep my Butterfinger Rice Krispie Treats from getting hard?
- Are Butterfinger Rice Krispie Treats gluten-free?
- How long do Butterfinger Rice Krispie Treats last?
- Final Thoughts
- 📖 Recipe Card
Why You’ll Love This Recipe
- Quick to Make: With minimal prep and cook time, you can whip these up in just 15 minutes!
- No Baking Required: Simply mix and chill—no need to heat up the oven.
- Deliciously Unique Flavor: The addition of Butterfinger bars gives a delightful twist to classic Rice Krispie treats.
- Versatile Treat: Perfect for any occasion—birthdays, holidays, or just a weekend snack.
- Kid-Friendly: Fun for children to help make, making it a great family activity.
Tools and Preparation
Getting your kitchen ready is key for making Butterfinger Rice Krispie Treats. Gather your essential tools before you start to ensure a smooth process.
Essential Tools and Equipment
- Non-stick pot
- Rubber spatula
- 9 x 13-inch baking dish
- Plastic bag
- Rolling pin or mallet
Importance of Each Tool
- Non-stick pot: Prevents ingredients from sticking and makes melting easy.
- Rubber spatula: Essential for mixing and spreading without damaging the treats.
- Baking dish: The right size ensures even cooling and easy cutting into bars.
Ingredients
Butterfinger Rice Krispie Treats are made with simple ingredients that come together for a delicious treat.
For the Base
- 1/4 cup unsalted butter
- 10.5 ounces mini vegan marshmallows
- 1/2 cup creamy peanut butter
For the Crunch
- 6 cups Rice Krispies cereal
- 5.7 ounces Butterfinger candy bars (3) 1.9 oz candy bars or 9 Fun Size
How to Make Butterfinger Rice Krispie Treats
Step 1: Prepare the Baking Dish
Spray a 9 x 13-inch baking dish with cooking spray to prevent sticking.
Step 2: Crush the Butterfingers
Place the Butterfinger candy bars into a plastic bag. Use a rolling pin or mallet to crush them into larger pieces—no need for perfect crumbs!
Step 3: Melt the Mixture
In a large non-stick pot over medium heat:
1. Melt the unsalted butter.
2. Add mini vegan marshmallows and stir until melted completely.
Step 4: Add Peanut Butter
Remove the pot from heat:
1. Stir in creamy peanut butter until fully melted and combined with the marshmallow mixture.
Step 5: Combine with Butterfingers
Add the crushed Butterfingers to the mixture:
1. Stir gently until evenly distributed throughout.
Step 6: Mix in Rice Krispies
Add Rice Krispies cereal:
1. Gently fold in until all cereal is coated with the mixture.
Step 7: Transfer to Baking Dish
Pour the entire mixture into your prepared baking dish:
1. Spread evenly using a greased rubber spatula for an even layer.
Step 8: Cool Completely
Allow the bars to cool completely at room temperature before cutting into squares—this should take about an hour.
Enjoy your delightful Butterfinger Rice Krispie Treats!
How to Serve Butterfinger Rice Krispie Treats
Butterfinger Rice Krispie Treats are delightful on their own, but you can elevate your serving experience with a few creative ideas. Whether it’s for a party, a family gathering, or just a cozy night in, these treats can be paired with various accompaniments.
With a Side of Ice Cream
- Vanilla ice cream: The classic choice that perfectly complements the chocolatey and peanut buttery flavors.
- Chocolate ice cream: For chocolate lovers, this pairing enhances the rich taste of the Butterfinger bars.
Drizzled with Chocolate Sauce
- Melted dark chocolate: A warm drizzle adds an extra layer of indulgence.
- White chocolate: A sweet contrast that looks beautiful when drizzled over the bars.
Topped with Whipped Cream
- Homemade whipped cream: Light and fluffy, it adds a creamy texture that balances the crunchy treats.
- Flavored whipped cream: Consider adding vanilla or chocolate syrup for an extra flavor boost.
Served with Fresh Fruit
- Sliced strawberries: Their tartness pairs well with the sweetness of the treats.
- Bananas: Sliced bananas add creaminess and complement the peanut butter flavor nicely.
How to Perfect Butterfinger Rice Krispie Treats
Creating the best Butterfinger Rice Krispie Treats is all about getting the right texture and flavor balance. Here are some tips to help you achieve perfection.
- Use fresh marshmallows: Fresh mini vegan marshmallows will melt better, resulting in a softer treat.
- Don’t overmix: Once you combine the Rice Krispies, mix gently to avoid crushing them too much.
- Grease your spatula: Coating your spatula with cooking spray makes it easier to spread the mixture evenly in the pan.
- Let them cool completely: Allowing the treats to cool fully helps them set up nicely for cutting into bars without crumbling.
Best Side Dishes for Butterfinger Rice Krispie Treats
Pairing side dishes with Butterfinger Rice Krispie Treats can enhance your dessert experience. Here are some great options to consider:
- Fruit Salad: A refreshing mix of seasonal fruits can balance out the sweetness of the treats.
- Veggie Platter: Crisp veggies like carrots and celery provide a crunchy contrast that’s satisfying.
- Cheese Board: A selection of cheeses can offer savory notes that pair well with sweet desserts.
- Popcorn: Lightly salted popcorn can be a great snack alongside these rich treats, adding crunch without competing flavors.
- Chocolate-Covered Pretzels: The salty-sweet combination complements the Butterfinger flavors perfectly.
- Yogurt Parfait: Layered yogurt with granola and berries can create a light and healthy side dish option.
Common Mistakes to Avoid
When making Butterfinger Rice Krispie Treats, avoiding common mistakes can ensure your treats turn out perfectly.
- Not prepping your pan – Skipping the greasing of the baking dish can make it hard to remove the treats later. Always spray or line your dish to prevent sticking.
- Overheating the marshmallows – Melting marshmallows too quickly can make them tough. Heat them gently and stir continuously for a smooth mixture.
- Crushing Butterfingers too finely – Crushing the candy bars into dust will lose the desired texture. Aim for larger pieces to maintain that delightful crunch.
- Not mixing quickly enough – The mixture can start to set as it cools, making it difficult to combine everything. Work swiftly when adding Rice Krispies and pouring into the pan.
- Skipping cooling time – Cutting into warm treats will result in a messy outcome. Allow them to cool completely for clean squares.
Storage & Reheating Instructions
Refrigerator Storage
- Store in an airtight container for up to 1 week.
- Place parchment paper between layers if stacking to prevent sticking.
Freezing Butterfinger Rice Krispie Treats
- Wrap tightly in plastic wrap and place in a freezer-safe bag.
- They can be frozen for up to 3 months without losing quality.
Reheating Butterfinger Rice Krispie Treats
- Oven – Preheat to 300°F (150°C) and warm for about 10 minutes until just soft.
- Microwave – Heat in short bursts of 10-15 seconds, checking frequently to avoid melting completely.
- Stovetop – Use a non-stick pan over low heat, stirring gently until warmed through.
Frequently Asked Questions
Here are some common questions about Butterfinger Rice Krispie Treats that may help you while making this delicious treat.
Can I use different candies in Butterfinger Rice Krispie Treats?
Yes! Feel free to substitute with any chocolate or candy of your choice, like Snickers or M&M’s, for a different flavor profile.
How do I keep my Butterfinger Rice Krispie Treats from getting hard?
To keep them soft, store them correctly and avoid overcooking the marshmallows. Adding a touch more butter can help maintain moisture.
Are Butterfinger Rice Krispie Treats gluten-free?
Rice Krispies may contain gluten; check for certified gluten-free options if needed.
How long do Butterfinger Rice Krispie Treats last?
These treats stay fresh in an airtight container at room temperature for about one week.
Final Thoughts
Butterfinger Rice Krispie Treats are not only easy to make but also offer a delightful blend of flavors that both kids and adults will love. You can customize these treats by adding nuts or other candy variations, making them perfect for any occasion or just a sweet snack at home. Try this recipe today and enjoy the gooey, crunchy goodness!
Did You Enjoy Making This Recipe? Please rate this recipe with ⭐⭐⭐⭐⭐ or leave a comment.
📖 Recipe Card
Print
Butterfinger Rice Krispie Treats
- Total Time: 15 minutes
- Yield: Approximately 12 servings 1x
Description
Indulge in the delightful taste of Butterfinger Rice Krispie Treats, a fun and easy no-bake dessert that combines crispy cereal with creamy peanut butter and the irresistible crunch of Butterfinger candy bars. Perfect for any occasion—from birthday parties to cozy family nights—these treats are a hit with both kids and adults alike. With just a few simple ingredients and minimal prep time, you can whip up this nostalgic sweet treat in under 15 minutes. Plus, there’s no baking involved, making them a quick solution for satisfying your sweet tooth. Elevate your treat experience with toppings like chocolate drizzle or fresh fruit for added flavor!
Ingredients
- 1/4 cup unsalted butter
- 10.5 ounces mini vegan marshmallows
- 1/2 cup creamy peanut butter
- 6 cups Rice Krispies cereal
- 5.7 ounces Butterfinger candy bars (3) or 9 Fun Size bars
Instructions
- Spray a 9 x 13-inch baking dish with cooking spray.
- Crush Butterfinger candy bars in a plastic bag using a rolling pin or mallet.
- In a non-stick pot over medium heat, melt the butter, then add mini marshmallows until fully melted.
- Stir in peanut butter until combined.
- Mix in crushed Butterfingers until evenly incorporated.
- Fold in Rice Krispies until well-coated.
- Spread mixture into the prepared dish using a greased spatula.
- Allow to cool completely before cutting into squares.
- Prep Time: 10 minutes
- Cook Time: 5 minutes
- Category: Dessert
- Method: No-bake
- Cuisine: American
Nutrition
- Serving Size: 1 serving
- Calories: 150
- Sugar: 12g
- Sodium: 80mg
- Fat: 6g
- Saturated Fat: 2g
- Unsaturated Fat: 4g
- Trans Fat: 0g
- Carbohydrates: 22g
- Fiber: <1g
- Protein: 2g
- Cholesterol: 0mg