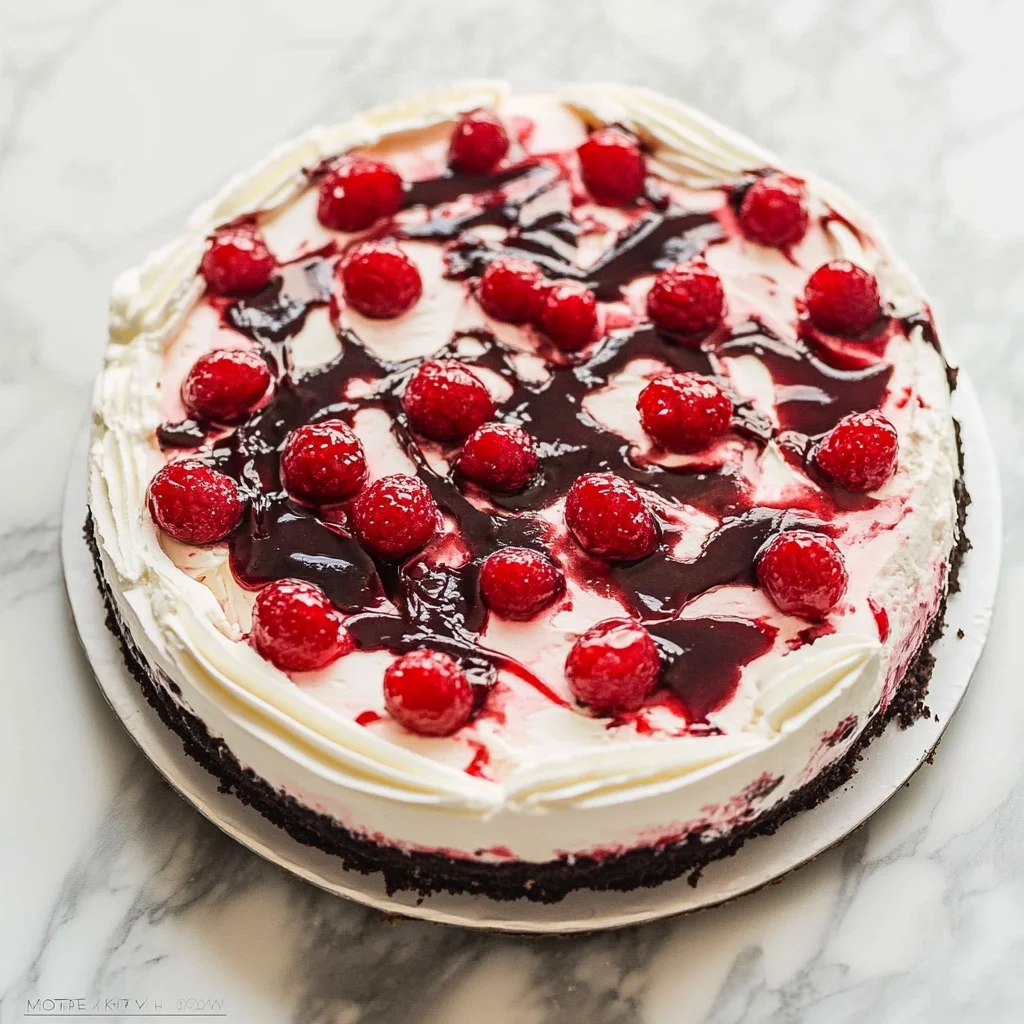
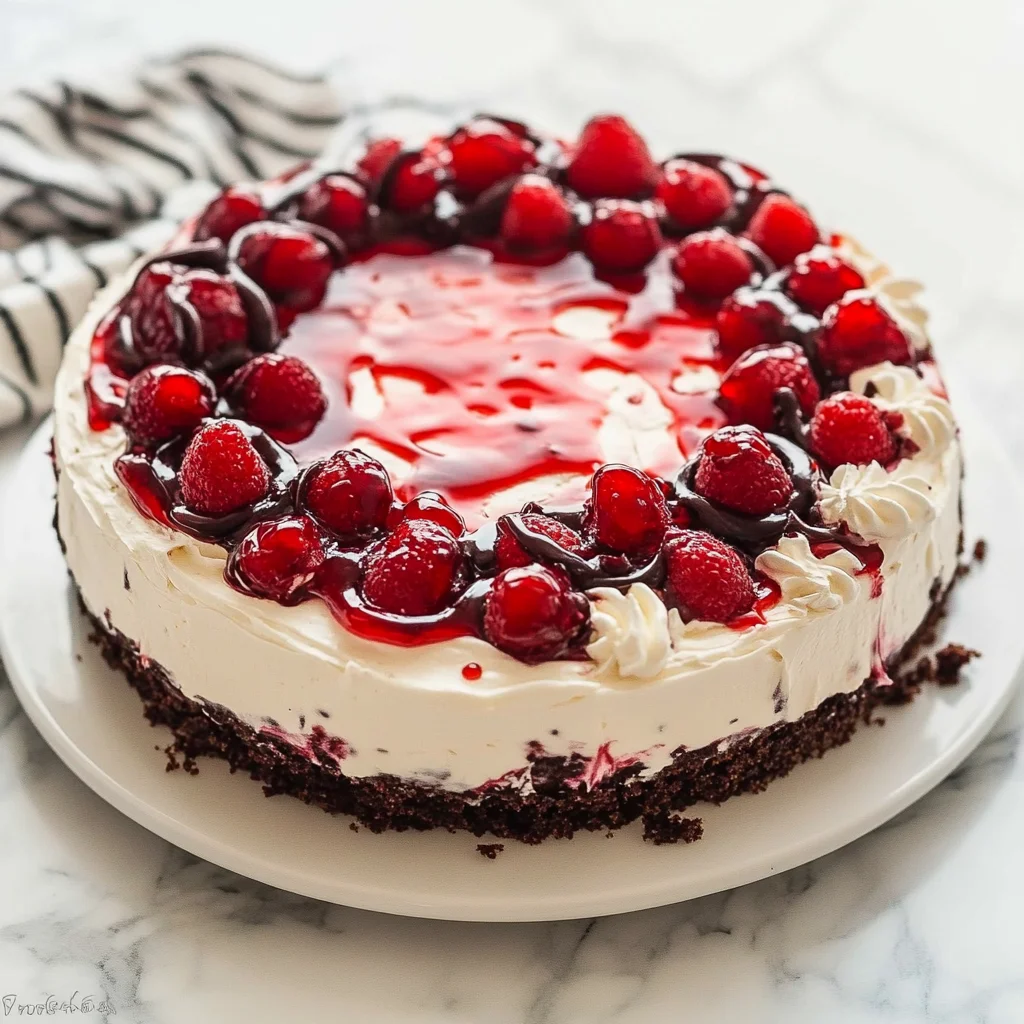
This No Bake Black Forest Icebox Cake is an ideal summer dessert that combines rich chocolate and sweet cherries. With just four simple ingredients, this cake is not only quick to prepare but also perfect for any occasion, from casual family dinners to festive gatherings. The layers of creamy whipped goodness and the delightful cherry topping make this dessert a standout treat that everyone will love.

Jump to:
- Why You’ll Love This Recipe
- Tools and Preparation
- Essential Tools and Equipment
- Importance of Each Tool
- Ingredients
- For Garnish
- How to Make No Bake Black Forest Icebox Cake
- Step 1: Prepare the Whipped Cream
- Step 2: Layer the Cookies
- Step 3: Add Toppings
- Step 4: Repeat Layers
- Step 5: Chill Before Serving
- How to Serve No Bake Black Forest Icebox Cake
- With Fresh Berries
- Topped with More Whipped Cream
- Served with Ice Cream
- With Garnish
- How to Perfect No Bake Black Forest Icebox Cake
- Best Side Dishes for No Bake Black Forest Icebox Cake
- Common Mistakes to Avoid
- Storage & Reheating Instructions
- Refrigerator Storage
- Freezing No Bake Black Forest Icebox Cake
- Reheating No Bake Black Forest Icebox Cake
- Frequently Asked Questions
- Can I use different flavors of pie filling?
- How do I stabilize whipped cream for longer storage?
- Is No Bake Black Forest Icebox Cake gluten-free?
- Can I customize my No Bake Black Forest Icebox Cake?
- Final Thoughts
- 📖 Recipe Card
Why You’ll Love This Recipe
- Effortless Preparation: With only four ingredients, this cake is simple to whip up, making it perfect for busy days.
- Delicious Flavor Combination: The rich chocolate paired with the sweetness of cherries creates an irresistible flavor profile.
- Versatile Serving Options: Serve it as a refreshing dessert at summer parties or a cozy treat during winter holidays.
- Make-Ahead Convenience: Prepare it in advance and let it chill overnight, saving you time on the day of your event.
- Crowd-Pleasing Dessert: This cake serves 12 people, ensuring there’s enough for everyone to enjoy!
Tools and Preparation
Before diving into making this delightful dessert, gather your tools for a smooth cooking experience. Having everything ready will help you focus on creating the best No Bake Black Forest Icebox Cake.
Essential Tools and Equipment
- Springform pan
- Mixing bowl
- Electric mixer
- Spatula
Importance of Each Tool
- Springform pan: This allows easy removal of the cake after chilling, ensuring a beautiful presentation.
- Electric mixer: Beat the cream quickly and efficiently, achieving fluffy whipped cream in no time.
Ingredients
This No Bake Black Forest Icebox Cake requires just a few key ingredients:
- 2 packages chocolate wafer cookies or chocolate graham crackers (about 300g)
- 1 can cherry pie filling (540ml or 2 cups)
- 2 cups heavy whipped cream (or substitute frozen whipped topping, thawed, and omit sugar)
- 1/2 cup powdered icing sugar
For Garnish
- 2 tablespoons fresh parsley, finely chopped
How to Make No Bake Black Forest Icebox Cake
Step 1: Prepare the Whipped Cream
In a large bowl, beat the heavy whipped cream and powdered icing sugar on high speed until stiff peaks form.
Step 2: Layer the Cookies
Place one layer of chocolate wafer cookies in a 9 springform pan. You can break them to fit or allow some overlapping.
Step 3: Add Toppings
Top with about 1/3 of the whipped cream mixture followed by 1/3 of the cherry pie filling.
Step 4: Repeat Layers
Repeat layers two more times for a total of three layers.
Step 5: Chill Before Serving
Cover the cake and refrigerate for at least six hours or overnight. Before serving, garnish with additional whipped cream if desired. Slice and enjoy your delicious creation!
How to Serve No Bake Black Forest Icebox Cake
Serving No Bake Black Forest Icebox Cake is as delightful as making it. This refreshing dessert pairs beautifully with various accompaniments that enhance its flavors and presentation.
With Fresh Berries
- Raspberries: Fresh raspberries add a tart contrast to the sweetness of the cake.
- Strawberries: Sliced strawberries can provide a vibrant color and additional freshness on each plate.
Topped with More Whipped Cream
- Extra Whipped Cream: For those who love cream, adding a dollop on top makes each slice even more indulgent.
- Chocolate Shavings: Sprinkle chocolate shavings on top for an elegant touch and rich flavor.
Served with Ice Cream
- Vanilla Ice Cream: A scoop of creamy vanilla ice cream complements the chocolate and cherry flavors perfectly.
- Cherry Sorbet: For a fruity twist, serve with cherry sorbet to echo the cake’s cherry filling.
With Garnish
- Mint Leaves: Fresh mint leaves not only look beautiful but also add a refreshing element to the dessert.
- Chocolate Sauce Drizzle: A drizzle of chocolate sauce can enhance the chocolate flavor while adding visual appeal.
How to Perfect No Bake Black Forest Icebox Cake
To ensure your No Bake Black Forest Icebox Cake turns out perfectly every time, consider these helpful tips.
- Boldly Stabilize Your Whipped Cream: Use stabilized whipped cream if you’re serving this cake later. It holds its shape better and lasts longer.
- Boldly Choose Quality Ingredients: Opt for high-quality chocolate wafer cookies and cherry pie filling for the best flavor profile.
- Boldly Allow Enough Chilling Time: Refrigerate your cake for at least 6 hours, or overnight if possible, to let the flavors meld beautifully.
- Boldly Layer Evenly: When layering, ensure each layer of whipped cream and cherry filling is spread evenly for consistent flavor in every bite.
- Boldly Personalize Your Toppings: Feel free to experiment with different toppings like nuts or additional fruit based on your preferences.
Best Side Dishes for No Bake Black Forest Icebox Cake
Pairing side dishes with your No Bake Black Forest Icebox Cake can elevate your dessert experience. Here are some great options:
- Bold Fruit Salad: A mix of seasonal fruits adds freshness and balances the richness of the cake.
- Bold Chocolate Mousse: This creamy dessert offers a luxurious texture that complements the icebox cake.
- Bold Almond Biscotti: Crunchy biscotti provides a delightful contrast in texture alongside your sweet treat.
- Bold Coffee or Espresso: A cup of coffee enhances the chocolate flavors in your dessert and creates a lovely after-dinner pairing.
- Bold Vanilla Pudding: The smoothness of vanilla pudding pairs well while adding another layer of sweetness.
- Bold Cheesecake Bites: Mini cheesecake bites offer a different yet delightful dessert experience alongside the icebox cake.
Common Mistakes to Avoid
Creating the perfect No Bake Black Forest Icebox Cake can be easy, but a few common mistakes can lead to disappointing results. Here’s what to watch out for:
- Skipping the chill time: Not allowing the cake to refrigerate for at least 6 hours can result in a mushy texture. Make sure to plan ahead and give it enough time to set properly.
- Overwhipping the cream: If you whip the cream too much, it can turn into butter. Stop as soon as stiff peaks form for the best texture in your icebox cake.
- Using stale cookies: Old or stale chocolate wafer cookies won’t provide the right flavor and texture. Always use fresh cookies for optimal taste.
- Not measuring ingredients accurately: Using too much or too little of any ingredient can change the consistency of your cake. Measure carefully, especially when it comes to whipped cream and icing sugar.
- Skipping garnishes: A simple garnish like extra whipped cream or chocolate shavings can elevate your dessert. Don’t skip this step if you want a visually appealing cake.
Storage & Reheating Instructions
Refrigerator Storage
- Store in an airtight container: Keep your No Bake Black Forest Icebox Cake covered in an airtight container to maintain freshness.
- Lasts up to 4 days: This cake can be stored in the refrigerator for up to four days without losing quality.
- Avoid stacking: If you have multiple desserts, place this icebox cake on a shelf where it won’t be squished by other items.
Freezing No Bake Black Forest Icebox Cake
- Use a freezer-safe container: If you want to store leftovers for later, use a freezer-safe container.
- Freezes well for up to 2 months: The cake can be frozen for about two months but may lose some texture after thawing.
- Thaw in refrigerator: When ready to enjoy again, thaw it in the refrigerator overnight rather than at room temperature.
Reheating No Bake Black Forest Icebox Cake
- Oven: Preheat to 350°F (175°C), cover with foil, and heat for about 10-15 minutes. This method is not typically used but can warm individual servings slightly.
- Microwave: Heat individual slices on low power for about 15-20 seconds. Keep an eye on it so that it doesn’t melt.
- Stovetop: Not recommended, as this dessert is best served cold and does not reheat well on the stovetop.
Frequently Asked Questions
Here are some questions that often arise regarding the No Bake Black Forest Icebox Cake.
Can I use different flavors of pie filling?
Yes! While cherry pie filling is traditional, you can experiment with other flavors like raspberry or strawberry for a unique twist.
How do I stabilize whipped cream for longer storage?
To stabilize whipped cream, you can add gelatin or cornstarch during whipping. This will help maintain its structure longer when stored.
Is No Bake Black Forest Icebox Cake gluten-free?
If you use gluten-free chocolate wafer cookies or graham crackers, this dessert can easily be made gluten-free!
Can I customize my No Bake Black Forest Icebox Cake?
Absolutely! Feel free to add layers of chocolate ganache or fresh fruit between layers for extra flavor and texture.
Final Thoughts
This No Bake Black Forest Icebox Cake is not only easy to make but also incredibly versatile. It’s perfect for summer gatherings or any occasion where you want a delicious dessert without turning on the oven. Feel free to customize it with different fruits or flavors based on your preference. Give this delightful treat a try—you won’t regret it!
Did You Enjoy Making This Recipe? Please rate this recipe with ⭐⭐⭐⭐⭐ or leave a comment.
📖 Recipe Card
Print
No Bake Black Forest Icebox Cake
- Total Time: 20 minutes
- Yield: Serves 12 1x
Description
Indulge in the delightful No Bake Black Forest Icebox Cake, a perfect summer dessert that harmoniously blends rich chocolate and sweet cherries. With only four simple ingredients, this no-bake wonder is quick to prepare and ideal for any occasion, from family dinners to festive gatherings. The layers of fluffy whipped cream paired with the luscious cherry topping create a showstopper dessert everyone will adore. This cake can be made ahead of time, allowing you to chill it overnight and serve a refreshing treat without any last-minute fuss.
Ingredients
- 2 packages chocolate wafer cookies or chocolate graham crackers (about 300g)
- 1 can cherry pie filling (540ml or 2 cups)
- 2 cups heavy whipped cream (or thawed frozen whipped topping)
- 1/2 cup powdered icing sugar
Instructions
- In a large mixing bowl, beat the heavy whipped cream and powdered icing sugar on high speed until stiff peaks form.
- Layer one package of chocolate wafer cookies in a 9" springform pan.
- Spread 1/3 of the whipped cream mixture over the cookies followed by 1/3 of the cherry pie filling.
- Repeat the layering process two more times for a total of three layers.
- Cover the cake and refrigerate for at least six hours or overnight before serving.
- Prep Time: 20 minutes
- Cook Time: 0 minutes
- Category: Dessert
- Method: No-Bake
- Cuisine: American
Nutrition
- Serving Size: 1 slice (approximately 90g)
- Calories: 250
- Sugar: 18g
- Sodium: 50mg
- Fat: 15g
- Saturated Fat: 9g
- Unsaturated Fat: 6g
- Trans Fat: 0g
- Carbohydrates: 26g
- Fiber: 1g
- Protein: 3g
- Cholesterol: 45mg