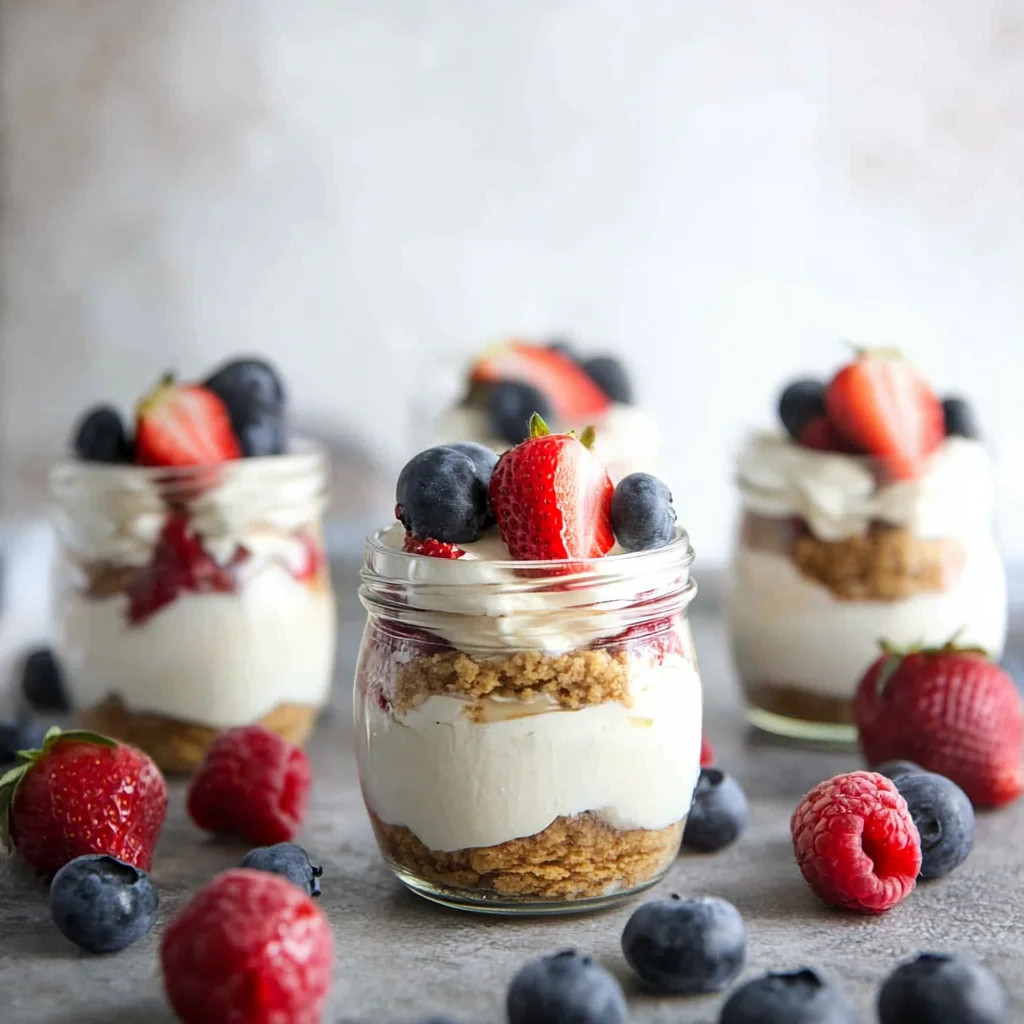
No-Bake Cheesecake Jars are the ultimate indulgent dessert that everyone can enjoy! They are easy to prepare and perfect for any occasion, whether it’s a summer picnic or a cozy family gathering. With just 7 ingredients and ready in only 20 minutes, these jars combine the creamy goodness of yogurt and cream cheese with fresh berries. Plus, they are gluten-free friendly, making them an excellent choice for guests with dietary restrictions.
Jump to:
- Why You’ll Love This Recipe
- Tools and Preparation
- Essential Tools and Equipment
- Importance of Each Tool
- Ingredients
- For the Crust
- For the Cheesecake Filling
- For Garnish
- How to Make No-Bake Cheesecake Jars
- Step 1: Prepare the Crust
- Step 2: Make the Cheesecake Filling
- Step 3: Assemble the Jars
- How to Serve No-Bake Cheesecake Jars
- Individual Servings
- Layered with More Berries
- Drizzled with Honey or Chocolate Sauce
- Topped with Whipped Cream
- Garnished with Mint Leaves
- Served in Mini Glasses
- How to Perfect No-Bake Cheesecake Jars
- Best Side Dishes for No-Bake Cheesecake Jars
- Common Mistakes to Avoid
- Storage & Reheating Instructions
- Refrigerator Storage
- Freezing No-Bake Cheesecake Jars
- Reheating No-Bake Cheesecake Jars
- Frequently Asked Questions
- Can I use low-fat yogurt for No-Bake Cheesecake Jars?
- How long do No-Bake Cheesecake Jars last?
- Can I customize my No-Bake Cheesecake Jars?
- Do I need to chill No-Bake Cheesecake Jars?
- What is the best way to serve No-Bake Cheesecake Jars?
- Final Thoughts
- 📖 Recipe Card
Why You’ll Love This Recipe
- Quick and Easy: With only 20 minutes of prep time, you can have this delightful dessert ready in no time.
- Healthier Option: Made with yogurt and less added sugar, these cheesecake jars are a guilt-free treat.
- Versatile Flavors: Customize your jars with different berries or toppings to suit your taste.
- No Baking Required: Perfect for hot days when you don’t want to turn on the oven.
- Beautiful Presentation: Serve in jars for an elegant look that impresses at any gathering.
Tools and Preparation
To make these No-Bake Cheesecake Jars, you’ll need some essential tools. Having the right equipment will ensure your preparation is smooth and efficient.
Essential Tools and Equipment
- Food processor or blender
- Mixing bowl
- Electric hand mixer
- Measuring cups and spoons
- Four jars or small cups
Importance of Each Tool
- Food processor or blender: Quickly turns graham crackers into fine crumbs for the crust.
- Electric hand mixer: Helps achieve a light and fluffy cheesecake filling effortlessly.
- Jars or small cups: Creates an attractive presentation for serving.
Ingredients
No-Bake Cheesecake Jars made with yogurt, cream cheese and less added sugar. Only 7 ingredients, ready in 20 minutes and finished with fresh summer berries! Gluten free friendly and the perfect summer dessert.
For the Crust
- ½ cup graham cracker crumbs
- 2 tablespoons softened butter or ghee
For the Cheesecake Filling
- 1 (8 ounce) package cream cheese (softened)
- 3 tablespoons granulated sugar (see notes)
- ⅔ cup vanilla or plain Greek yogurt or Skyr yogurt
- ½ teaspoon vanilla extract
- 1 teaspoon lemon juice
For Garnish
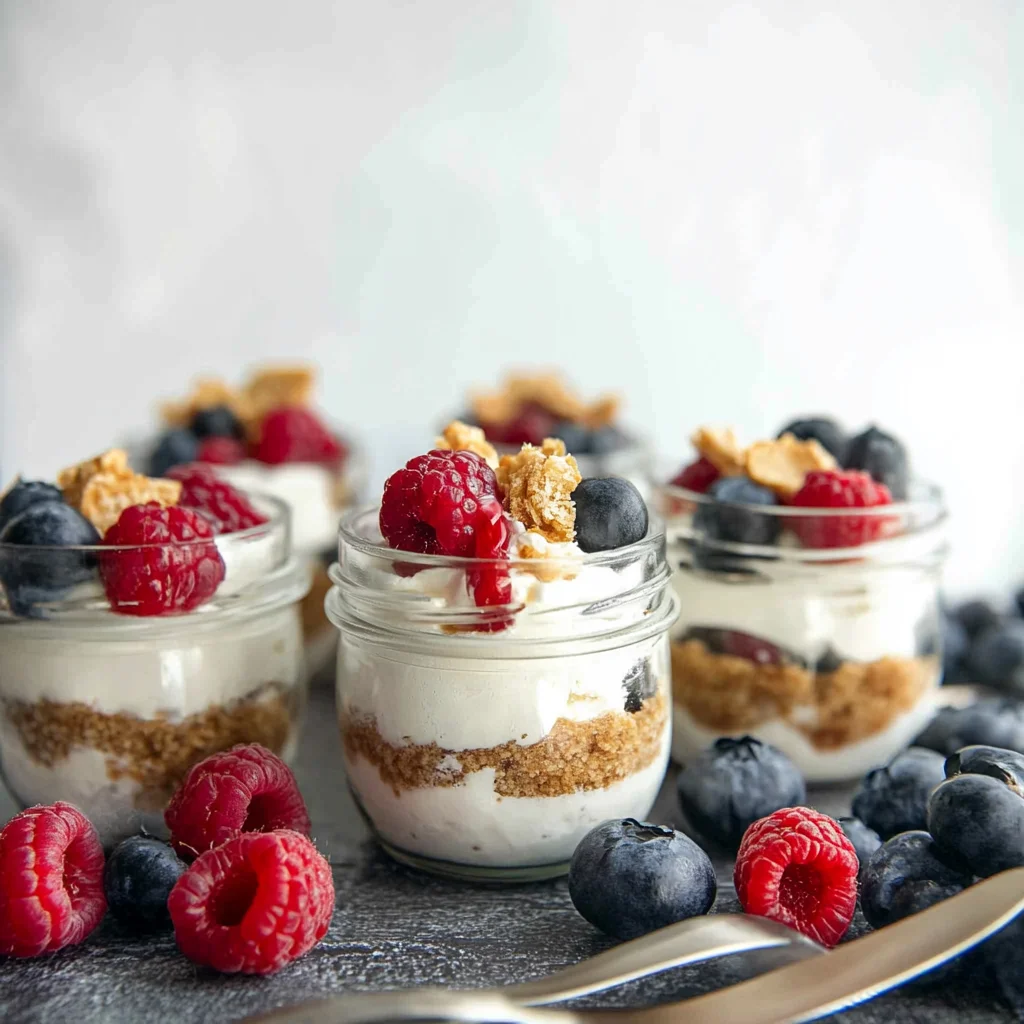
- Fresh berries (chopped strawberries, blueberries, and/or raspberries)
How to Make No-Bake Cheesecake Jars
Step 1: Prepare the Crust
- In a small food processor or blender, process graham crackers into crumbs.
- Transfer crumbs to a bowl with melted butter, stirring until crumbs are moistened.
- Add about 1.5 tablespoons of this mixture to each jar, pressing it into the bottom with the back of a spoon; set aside.
Step 2: Make the Cheesecake Filling
- In a medium mixing bowl using an electric hand mixer, beat together softened cream cheese with sugar until light and fluffy.
- Add in yogurt, vanilla extract, and lemon juice, mixing on medium-high speed until well combined. The mixture should be thick and smooth.
Step 3: Assemble the Jars
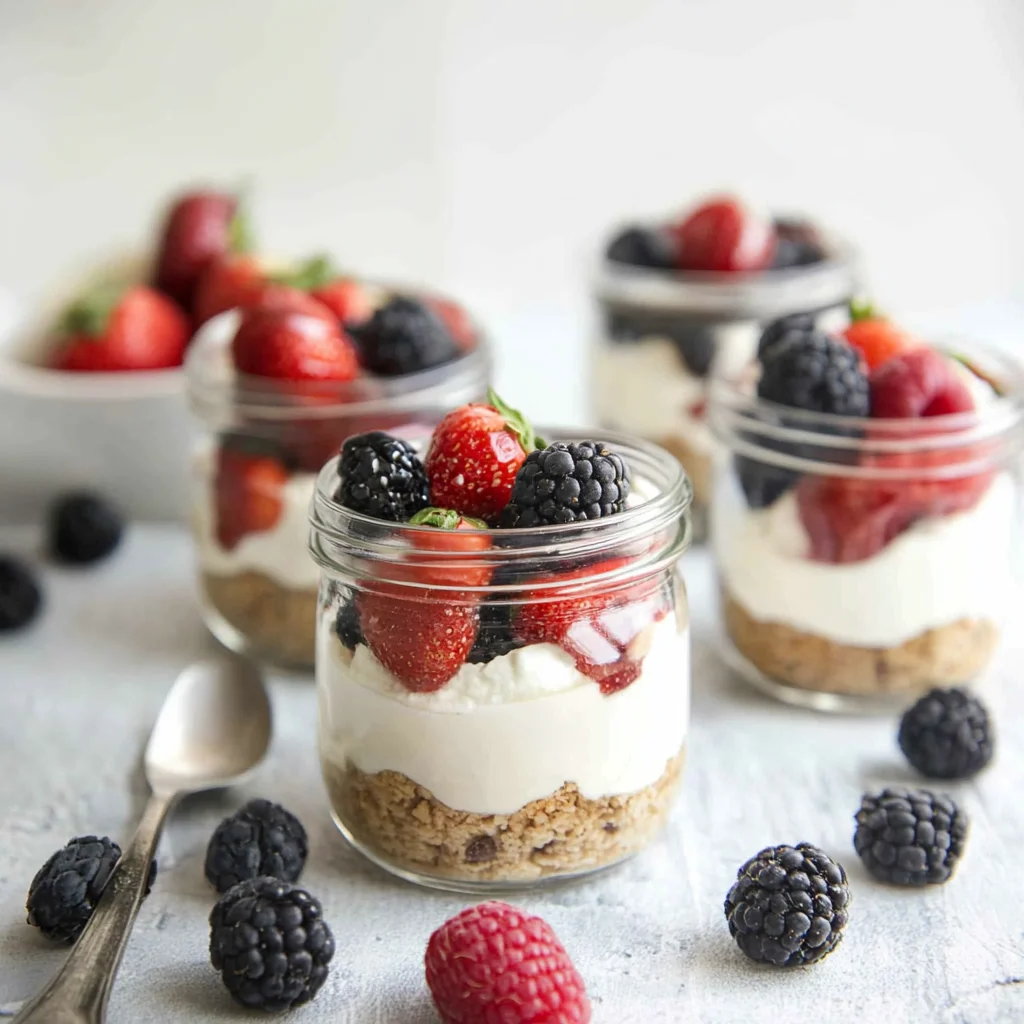
- Transfer the cream cheese yogurt mixture evenly into the four jars.
- Top each jar with fresh berries, layering them as desired.
- The cheesecake jars do not need to be chilled to enjoy right away; however, if preparing ahead of time, cover and refrigerate until ready to serve.
How to Serve No-Bake Cheesecake Jars
No-Bake Cheesecake Jars are a delightful treat that can be served in various exciting ways. Here are some creative serving suggestions to elevate your dessert experience.
Individual Servings
- Each jar can be enjoyed as a personal dessert, making it easy for guests to indulge without sharing.
Layered with More Berries
- Add a mix of fresh berries on top for an extra burst of flavor and color. Strawberries, blueberries, and raspberries work wonderfully together.
Drizzled with Honey or Chocolate Sauce
- A drizzle of honey or chocolate sauce adds sweetness and richness. This can be done just before serving for a beautiful presentation.
Topped with Whipped Cream
- A dollop of whipped cream on top provides a light and airy texture that complements the cheesecake filling perfectly.
Garnished with Mint Leaves
- Fresh mint leaves not only add a pop of color but also provide a refreshing taste that balances the sweetness of the cheesecake jars.
Served in Mini Glasses
- Use mini glasses or shot glasses for a fun twist. These are great for parties and allow guests to sample different flavors.
How to Perfect No-Bake Cheesecake Jars
Creating the perfect No-Bake Cheesecake Jars is easy with these helpful tips. Follow them to ensure your dessert turns out delicious every time!
Use Room Temperature Ingredients: Starting with room temperature cream cheese helps create a smoother filling without lumps.
Adjust Sweetness: Feel free to modify the sugar amount based on your preference. You can even use natural sweeteners like honey or agave syrup.
Experiment with Flavors: Try adding different flavors such as almond extract or citrus zest to customize your cheesecake jars.
Chill Before Serving: For the best texture, chill your jars in the refrigerator for at least 30 minutes before serving, allowing all flavors to meld beautifully.
Choose Quality Yogurt: Using high-quality Greek yogurt enhances the creaminess and adds protein, making your dessert even more satisfying.
Mix Well: Ensure all ingredients are well combined when mixing the cheesecake filling; this will result in a light and fluffy texture.

Best Side Dishes for No-Bake Cheesecake Jars
Pairing side dishes with No-Bake Cheesecake Jars can enhance your dessert experience significantly. Here are some great options to consider:
Fresh Fruit Salad: A mix of seasonal fruits provides a refreshing contrast to the rich cheesecake flavor.
Chocolate-Covered Pretzels: The salty-sweet combination of pretzels dipped in chocolate creates an irresistible snack alongside your dessert.
Vanilla Ice Cream: A scoop of vanilla ice cream adds creamy goodness that pairs well with the tangy cheesecake jars.
Coffee or Espresso: A warm cup of coffee brings out the flavors of the cheesecake while providing a delightful caffeine boost post-meal.
Cheese Platter: Include assorted cheeses for an elegant touch; they balance sweetness and offer savory notes alongside the dessert.
Nutty Granola Bars: Crunchy granola bars provide texture contrast and make for an excellent finger food option next to your jars.
Coconut Macaroons: These chewy treats offer coconut flavor that complements the creamy cheesecake beautifully.
Savory Vegetable Chips: For something different, serve crunchy vegetable chips which add a unique twist to your dessert spread.
Common Mistakes to Avoid
Making No-Bake Cheesecake Jars can be easy, but a few common mistakes can lead to disappointing results. Here are some things to watch out for:
Using cold cream cheese: Always ensure your cream cheese is softened before mixing. Cold cream cheese can create lumps in your filling, making it less smooth.
Skipping the crust preparation: Don’t skip pressing the graham cracker crumbs into the jar. This creates a solid base for your cheesecake and enhances the texture.
Overmixing the filling: Mix just until combined. Overmixing can incorporate too much air, resulting in a fluffy texture rather than a dense cheesecake.
Not using ripe berries: Fresh summer berries make this dessert shine. Using unripe or frozen berries can lead to a less flavorful experience.
Ignoring refrigeration time: While you can enjoy them right away, letting the jars chill for at least an hour enhances the flavors and texture of the cheesecake filling.
Storage & Reheating Instructions
Refrigerator Storage
- Store No-Bake Cheesecake Jars in an airtight container.
- They last up to 3 days in the refrigerator.
- Keep them covered to prevent absorption of odors from other foods.
Freezing No-Bake Cheesecake Jars
- These jars can be frozen for up to 2 months.
- Use freezer-safe containers or wrap tightly with plastic wrap.
- Thaw overnight in the refrigerator before serving.
Reheating No-Bake Cheesecake Jars
Oven: Preheat your oven to 350°F (175°C) and warm the jars for about 10 minutes. This method is not typical for no-bake desserts but can work if you want to slightly warm the filling.
Microwave: Heat on low power for 15-20 seconds. Check frequently to avoid overheating, which can change the texture.
Stovetop: Place jars in a pan of simmering water for about 5 minutes. This gentle heat helps maintain the creamy texture without cooking it.
Frequently Asked Questions
Here are some commonly asked questions about making No-Bake Cheesecake Jars:
Can I use low-fat yogurt for No-Bake Cheesecake Jars?
Yes, you can use low-fat yogurt or even Greek yogurt. Just keep in mind that this might slightly alter the creaminess of your filling.
How long do No-Bake Cheesecake Jars last?
When stored properly in the fridge, they will stay fresh for about 3 days.
Can I customize my No-Bake Cheesecake Jars?
Absolutely! You can add different flavors or toppings like chocolate chips, nuts, or other fruit varieties for a personal touch.
Do I need to chill No-Bake Cheesecake Jars?
While they are safe to eat immediately, chilling them improves flavor and texture significantly, so it’s recommended.
What is the best way to serve No-Bake Cheesecake Jars?
Serve them chilled with a dollop of whipped cream and extra fresh berries on top for added flavor and presentation.
Final Thoughts
No-Bake Cheesecake Jars are a delightful summer treat that combines simplicity and flavor. With just seven ingredients and minimal prep time, they are perfect for gatherings or a sweet snack at home. Feel free to customize these jars with your favorite toppings or flavors, making this dessert versatile enough to suit any taste. Give them a try; you won’t be disappointed!
Did You Enjoy Making This Recipe? Please rate this recipe with ⭐⭐⭐⭐⭐ or leave a comment.
📖 Recipe Card
Print
No-Bake Cheesecake Jars
- Total Time: 0 hours
- Yield: Serves 4
Description
Indulge in the creamy delight of No-Bake Cheesecake Jars, a luscious dessert that combines the smoothness of cream cheese and yogurt with the vibrant freshness of summer berries. This easy-to-make treat, ready in just 20 minutes, requires no oven and is perfect for any occasion—from summer picnics to cozy gatherings. With only seven simple ingredients, these gluten-free jars are a healthier option that everyone can enjoy. Customize your cheesecake with different fruits or toppings to suit your taste, making this dessert not only delicious but also visually stunning.
Ingredients
- ½ cup graham cracker crumbs
- 2 tablespoons softened butter
- 1 (8 ounce) package cream cheese (softened)
- 3 tablespoons granulated sugar
- ⅔ cup Greek yogurt
- ½ teaspoon vanilla extract
- 1 teaspoon lemon juice
- Fresh berries for garnish
Instructions
- Prepare the crust by blending graham crackers into crumbs and mixing with melted butter. Press into the bottom of four jars.
- In a bowl, mix softened cream cheese with sugar using an electric mixer until fluffy. Add yogurt, vanilla extract, and lemon juice; blend until smooth.
- Divide the cream cheese mixture evenly among the jars, then top with fresh berries.
- Serve immediately or chill for enhanced flavor.
- Prep Time: 20 minutes
- Cook Time: None
- Category: Dessert
- Method: No Baking
- Cuisine: American
Nutrition
- Serving Size: 1 jar (150g)
- Calories: 250
- Sugar: 10g
- Sodium: 150mg
- Fat: 12g
- Saturated Fat: 7g
- Unsaturated Fat: 4g
- Trans Fat: 0g
- Carbohydrates: 30g
- Fiber: 1g
- Protein: 6g
- Cholesterol: 35mg