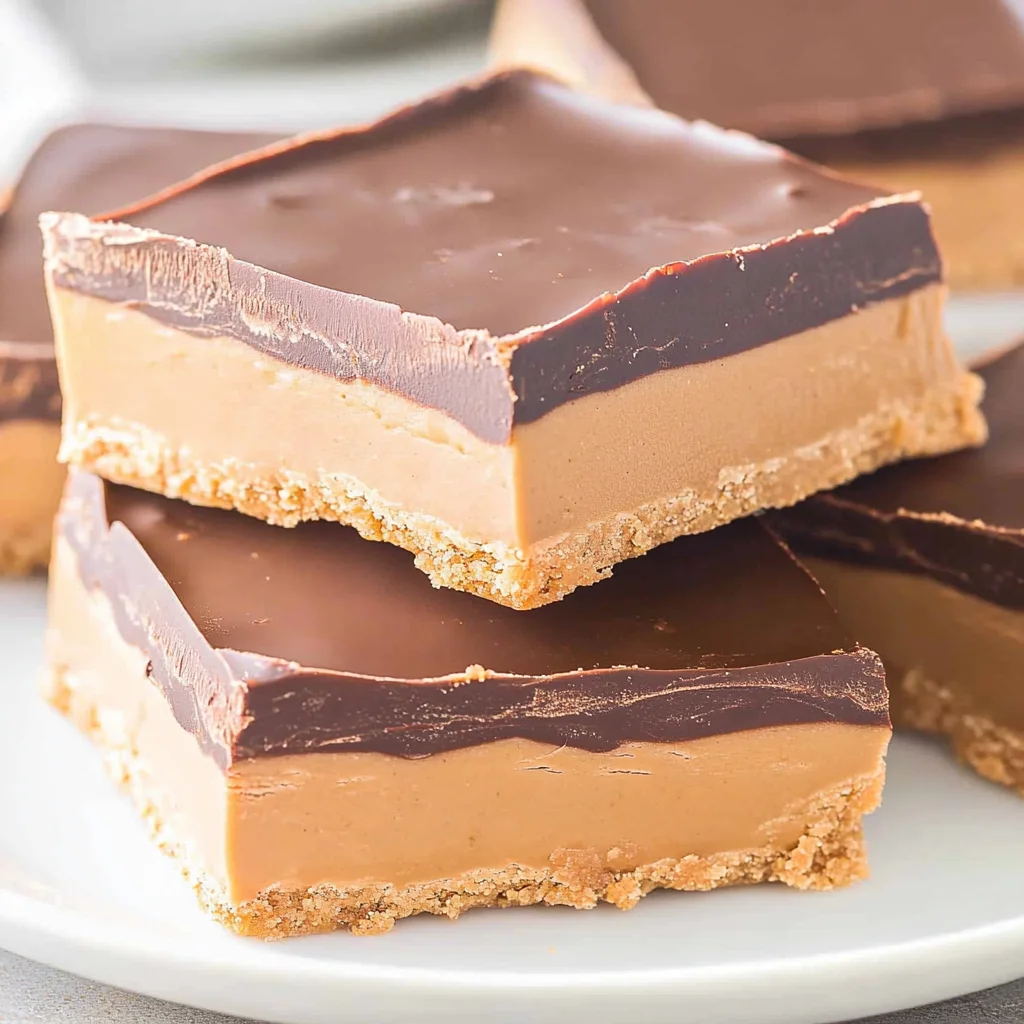
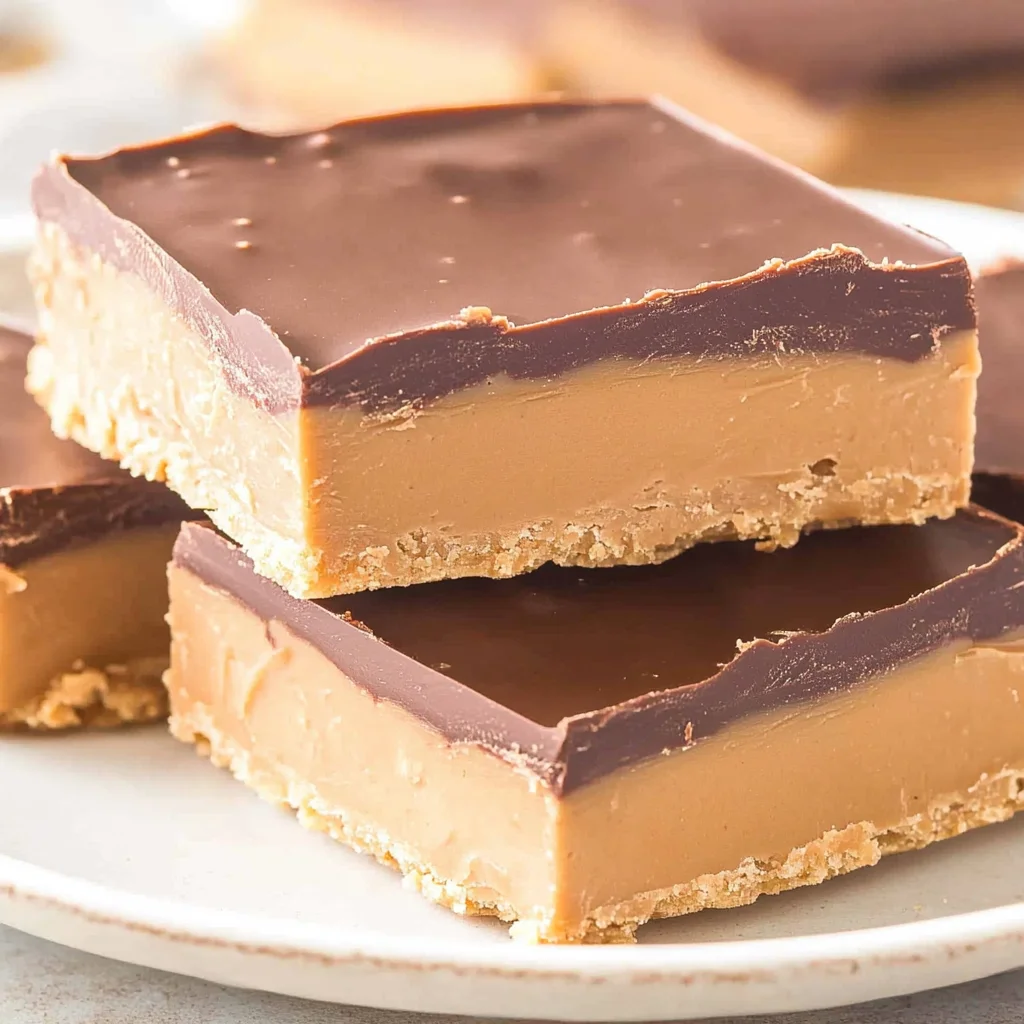
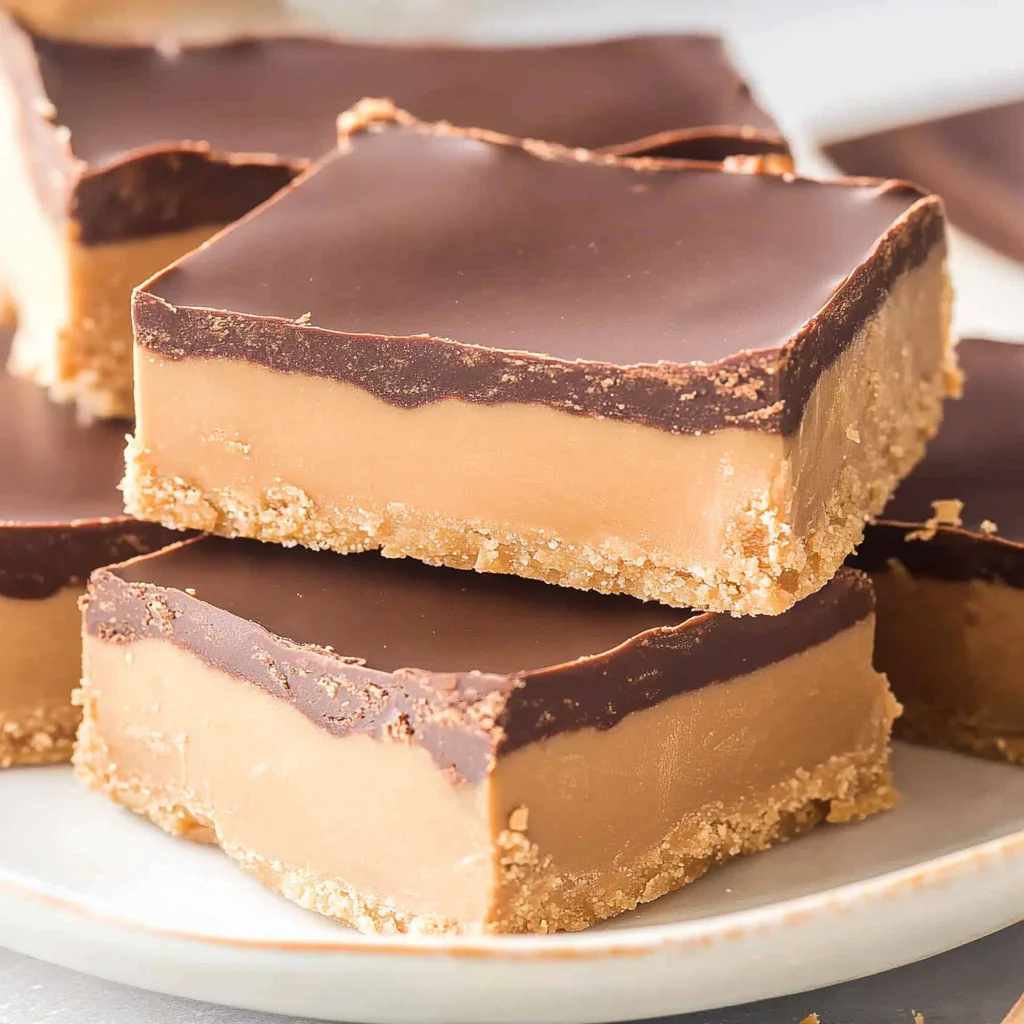
Quick and easy no-bake Chocolate Peanut Butter Bars are the perfect sweet treat for anytime. These bars combine the rich flavors of chocolate and creamy peanut butter, making them an irresistible dessert for any occasion. Whether you’re hosting a party, enjoying a family movie night, or simply craving something sweet, these bars are sure to delight. Plus, their simple preparation means you can whip them up in no time!
Jump to:
- Why You’ll Love This Recipe
- Tools and Preparation
- Essential Tools and Equipment
- Importance of Each Tool
- Ingredients
- For the Base
- For the Topping
- How to Make No-Bake Chocolate Peanut Butter Bars
- Step 1: Crush the Vanilla Wafers
- Step 2: Combine Dry Ingredients
- Step 3: Mix Wet Ingredients
- Step 4: Prepare Baking Pan
- Step 5: Chill the Base
- Step 6: Melt Chocolate Mixture
- Step 7: Add Topping Layer
- Step 8: Final Chill Time
- Step 9: Serve Your Bars
- How to Serve No-Bake Chocolate Peanut Butter Bars
- Pair with Fresh Fruits
- Drizzle with Caramel Sauce
- Serve with Ice Cream
- Garnish with Nuts
- How to Perfect No-Bake Chocolate Peanut Butter Bars
- Best Side Dishes for No-Bake Chocolate Peanut Butter Bars
- Common Mistakes to Avoid
- Storage & Reheating Instructions
- Refrigerator Storage
- Freezing No-Bake Chocolate Peanut Butter Bars
- Reheating No-Bake Chocolate Peanut Butter Bars
- Frequently Asked Questions
- How do I make No-Bake Chocolate Peanut Butter Bars healthier?
- Can I customize my No-Bake Chocolate Peanut Butter Bars?
- How long do No-Bake Chocolate Peanut Butter Bars last?
- What is the best way to cut No-Bake Chocolate Peanut Butter Bars?
- Final Thoughts
- 📖 Recipe Card
Why You’ll Love This Recipe
- No Baking Required: You won’t need to turn on the oven, making this recipe perfect for hot days.
- Quick Preparation: With just 15 minutes of prep time, you can make these delicious treats in no time.
- Rich Flavor Combination: The blend of chocolate and peanut butter is a classic that everyone loves.
- Versatile Treat: Great for parties, picnics, or a cozy night in; they fit any occasion perfectly.
- Easy to Customize: Feel free to add nuts or swap out chocolate for white chocolate if desired.
Tools and Preparation
Having the right tools will make your preparation smooth and enjoyable. Here’s what you’ll need:
Essential Tools and Equipment
- Food processor
- 8×8 inch baking pan
- Parchment paper
- Microwave-safe bowl
- Spatula
Importance of Each Tool
- Food processor: It ensures even crushing of vanilla wafers and smooth mixing of ingredients.
- 8×8 inch baking pan: This size is perfect for achieving the right thickness for your bars.
- Parchment paper: It prevents sticking and makes it easier to remove the bars once set.
Ingredients
To make these delightful No-Bake Chocolate Peanut Butter Bars, gather the following ingredients:
For the Base
- 3 cups vanilla wafers
- 2 cups powdered sugar
- 1 ¼ cups creamy peanut butter (divided)
- ¾ cup salted butter, melted (1 ½ stick)
- 1 teaspoon vanilla
For the Topping
- 1 cup milk chocolate chips
How to Make No-Bake Chocolate Peanut Butter Bars
Step 1: Crush the Vanilla Wafers
Place the vanilla wafers in a food processor and pulse until crushed into fine crumbs, about 1-2 minutes.
Step 2: Combine Dry Ingredients
Add in the powdered sugar to the food processor and pulse 1-2 times until combined.
Step 3: Mix Wet Ingredients
Add 1 cup of the divided peanut butter, melted butter, and vanilla extract to the food processor. Blend together until a smooth, thick dough forms, about 2-3 minutes.
Step 4: Prepare Baking Pan
Line an 8×8 inch baking pan with parchment paper. Scoop in the peanut butter dough and press it down into an even layer in the prepared pan.
Step 5: Chill the Base
Cover it with plastic wrap and place it in the refrigerator to chill while you prepare the topping.
Step 6: Melt Chocolate Mixture
In a microwave-safe bowl, place the chocolate chips and remaining ¼ cup of creamy peanut butter. Heat for 60 seconds and stir until smooth. If needed, continue heating in 10-second increments until fully melted.
Step 7: Add Topping Layer
Pour the chocolate mixture over the top of the peanut butter layer. Use a spatula to smooth it into an even layer.
Step 8: Final Chill Time
Cover the pan with plastic wrap again and refrigerate until set, about 3-4 hours.
Step 9: Serve Your Bars
Once completely set, cut into squares and serve as part of your dessert spread or enjoy them all by yourself!
How to Serve No-Bake Chocolate Peanut Butter Bars
No-bake chocolate peanut butter bars are a delightful treat that can be served in various ways to enhance their flavor and presentation. Whether you’re hosting a party or enjoying a quiet evening at home, these serving suggestions will elevate your dessert experience.
Pair with Fresh Fruits
- Berries: Serve your bars with fresh strawberries or raspberries for a refreshing contrast.
- Banana Slices: The sweetness of bananas complements the rich flavors of the bars perfectly.
Drizzle with Caramel Sauce
- Caramel Sauce: A light drizzle adds an extra layer of sweetness and enhances the overall taste.
Serve with Ice Cream
- Vanilla Ice Cream: The creamy texture of vanilla ice cream pairs beautifully with the dense bars.
- Chocolate Ice Cream: For chocolate lovers, this is a rich combination that satisfies every craving.
Garnish with Nuts
- Chopped Peanuts: Sprinkle chopped peanuts on top for added crunch and flavor.
- Sea Salt Flakes: A few flakes of sea salt can enhance the sweetness and create a delightful contrast.
How to Perfect No-Bake Chocolate Peanut Butter Bars
To ensure your no-bake chocolate peanut butter bars turn out perfectly every time, follow these helpful tips. Making minor adjustments can lead to great results!
- Use Room Temperature Ingredients: Ensure your butter and peanut butter are at room temperature for easier mixing.
- Press Firmly: When layering the peanut butter mixture in the pan, press it down firmly for even thickness.
- Chill Long Enough: Allow ample chilling time in the refrigerator; this helps the layers set properly.
- Avoid Overheating Chocolate: Heat chocolate slowly in intervals to prevent burning and achieve a smooth consistency.
- Experiment with Toppings: Try different toppings like shredded coconut or mini chocolate chips for variety.
Best Side Dishes for No-Bake Chocolate Peanut Butter Bars
While these bars are delicious on their own, pairing them with side dishes can create an even more enjoyable dessert experience. Here are some great options to consider:
- Fruit Salad: A mix of seasonal fruits adds freshness and balances the richness of the bars.
- Yogurt Parfait: Layer yogurt with granola and fruits to create a light yet satisfying complement.
- Coffee or Espresso: The bitterness of coffee pairs well with sweet desserts, enhancing their flavors.
- Milkshakes: A thick milkshake is indulgent and makes for a fun pairing with these bars.
- Cheese Platter: A selection of cheeses can provide savory notes that contrast nicely with the sweet bars.
- Chocolate-Covered Pretzels: The salty crunch offers a delightful textural contrast to the creamy bars.
Common Mistakes to Avoid
Making No-Bake Chocolate Peanut Butter Bars can be simple, but there are some common pitfalls that can affect the outcome. Here are a few mistakes to watch for:
- Skipping the chilling step: Failing to chill the bars long enough can result in a soft texture. Always let them set for at least 3-4 hours in the refrigerator.
- Overheating the chocolate: Heating chocolate chips too long can cause them to seize. Use short increments in the microwave and stir frequently until smooth.
- Not using parchment paper: Omitting parchment paper may lead to difficulty removing the bars from the pan. Always line your baking dish for easy removal and cleanup.
- Incorrect measuring of ingredients: Using too much or too little of any ingredient can alter the texture and flavor. Measure carefully, especially with sticky items like peanut butter.
- Not pressing firmly enough: If you don’t press down on the peanut butter layer, it may crumble when cut. Ensure it’s compacted evenly in the pan.
Storage & Reheating Instructions
Refrigerator Storage
- Store in an airtight container for up to 1 week.
- Keep layers separated with parchment paper to prevent sticking.
Freezing No-Bake Chocolate Peanut Butter Bars
- Wrap bars tightly in plastic wrap and then foil for optimal freshness.
- They can be frozen for up to 3 months; just thaw in the refrigerator before serving.
Reheating No-Bake Chocolate Peanut Butter Bars
- Oven: Preheat to 350°F (175°C) and warm for about 5-10 minutes until slightly softened.
- Microwave: Heat individual pieces on low power for 10-15 seconds until just warm.
- Stovetop: Place a small pan over low heat and add a touch of butter; warm each piece gently, watching closely to avoid melting completely.
Frequently Asked Questions
How do I make No-Bake Chocolate Peanut Butter Bars healthier?
You can substitute some ingredients with healthier alternatives such as almond flour instead of vanilla wafers or use dark chocolate instead of milk chocolate for added nutrients.
Can I customize my No-Bake Chocolate Peanut Butter Bars?
Yes! You can add nuts, dried fruits, or even a layer of caramel between the peanut butter and chocolate layers for extra flavor.
How long do No-Bake Chocolate Peanut Butter Bars last?
When stored properly in an airtight container, they will last about 1 week in the refrigerator or up to 3 months if frozen.
What is the best way to cut No-Bake Chocolate Peanut Butter Bars?
Using a sharp knife dipped in warm water will help you cut through the bars cleanly, preventing any crumbling.
Final Thoughts
These No-Bake Chocolate Peanut Butter Bars are not only delicious but also versatile. Perfect as a quick dessert or treat, they can easily be customized with your favorite mix-ins. I encourage you to try making them and experimenting with different flavors!
Did You Enjoy Making This Recipe? Please rate this recipe with ⭐⭐⭐⭐⭐ or leave a comment.
📖 Recipe Card
Print
No-Bake Chocolate Peanut Butter Bars
- Total Time: 0 hours
- Yield: Approximately 16 servings 1x
Description
Indulge in the delightful taste of No-Bake Chocolate Peanut Butter Bars, the ultimate sweet treat that’s both quick and easy to prepare. These delicious bars combine the rich flavors of creamy peanut butter and velvety chocolate, making them an irresistible dessert for any occasion. Perfect for family gatherings, movie nights, or simply satisfying your sweet tooth, these bars can be whipped up in just 15 minutes without ever having to turn on the oven. With endless customization options, you can add nuts or use different types of chocolate to make each batch your own. Discover how this simple recipe can elevate your dessert game!
Ingredients
- 3 cups vanilla wafers
- 2 cups powdered sugar
- 1 ¼ cups creamy peanut butter (divided)
- ¾ cup salted butter, melted
- 1 teaspoon vanilla
- 1 cup milk chocolate chips
Instructions
- Crush vanilla wafers in a food processor until fine crumbs.
- Add powdered sugar and pulse to combine.
- Mix in 1 cup peanut butter, melted butter, and vanilla until smooth.
- Line an 8×8 inch pan with parchment paper and press the mixture evenly into the bottom.
- Chill while preparing the topping.
- Melt chocolate chips with remaining peanut butter in a microwave-safe bowl until smooth.
- Pour over the chilled base and spread evenly.
- Refrigerate until set for about 3-4 hours.
- Cut into squares and serve.
- Prep Time: 15 minutes
- Cook Time: None
- Category: Dessert
- Method: No-Bake
- Cuisine: American
Nutrition
- Serving Size: 1 square (45g)
- Calories: 200
- Sugar: 16g
- Sodium: 130mg
- Fat: 12g
- Saturated Fat: 5g
- Unsaturated Fat: 6g
- Trans Fat: 0g
- Carbohydrates: 22g
- Fiber: 1g
- Protein: 3g
- Cholesterol: 15mg