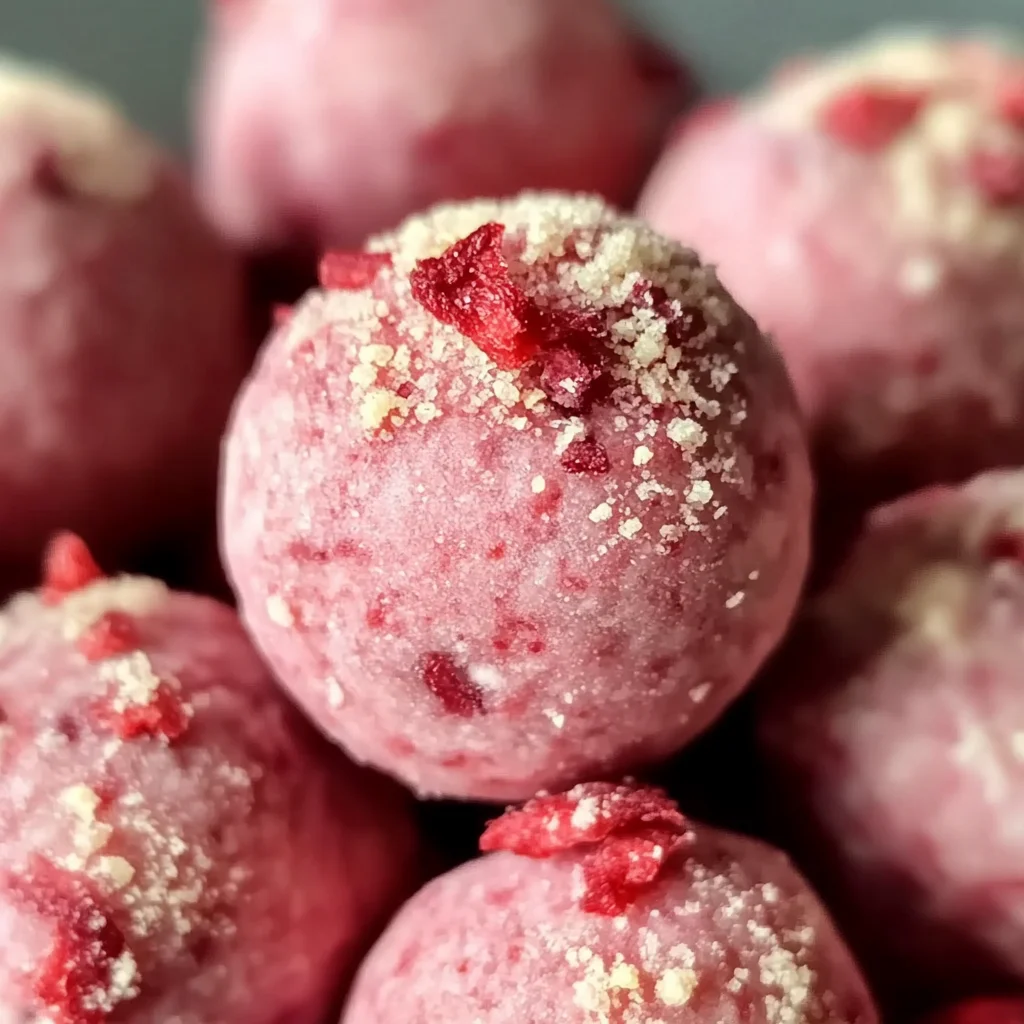
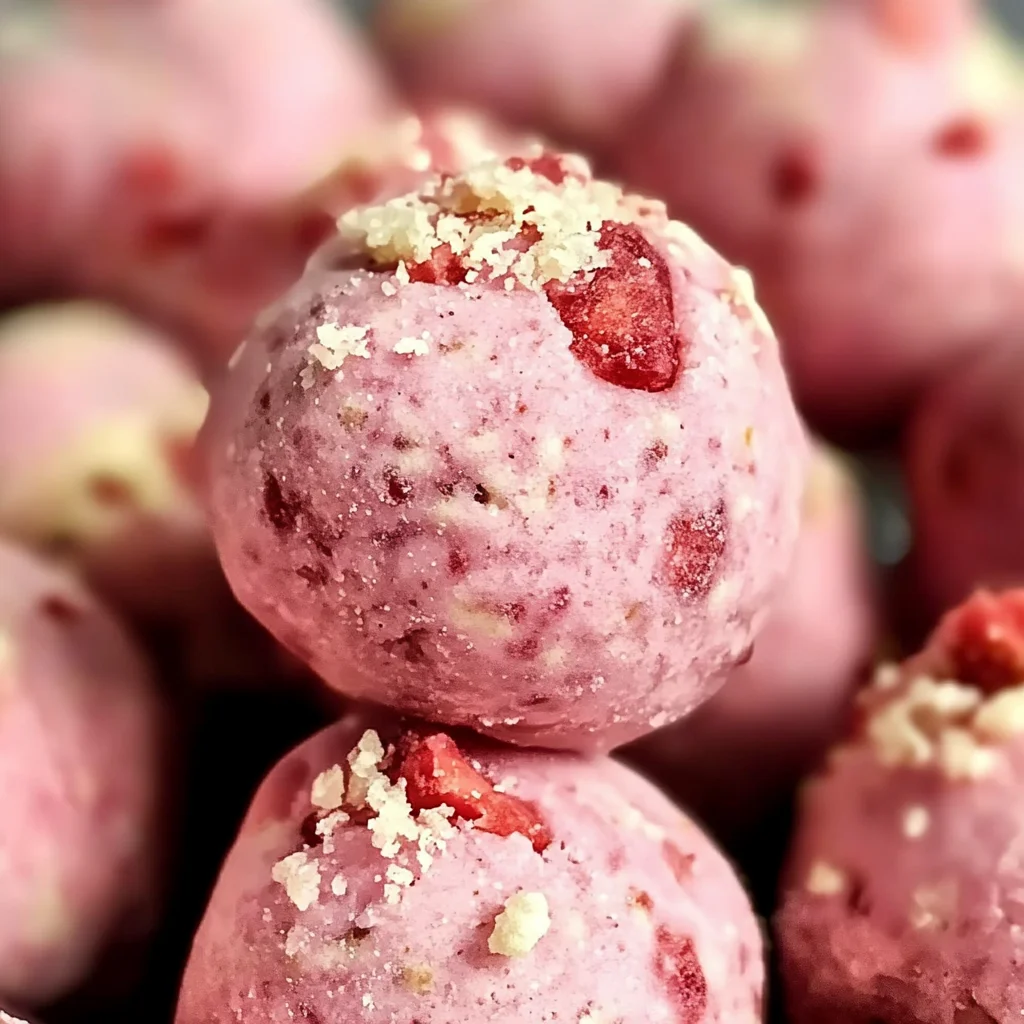
These Strawberry Cheesecake Protein Balls are a delightful blend of flavors and nutrients, making them the perfect snack for any occasion. Whether you need a quick boost before your workout or a sweet treat after a long day, these no-bake bites offer creamy cheesecake goodness without any guilt. Packed with protein and naturally sweetened, they stand out as a healthy choice for both kids and adults alike.
Jump to:
- Why You’ll Love This Recipe
- Tools and Preparation
- Essential Tools and Equipment
- Importance of Each Tool
- Ingredients
- For the Base
- For Sweetness and Flavor
- For Texture and Taste
- How to Make Strawberry Cheesecake Protein Balls
- Step 1: Prepare Ingredients
- Step 2: Combine Ingredients
- Step 3: Adjust Consistency
- Step 4: Form Protein Balls
- Step 5: Chill
- Step 6: Store
- How to Serve Strawberry Cheesecake Protein Balls
- As a Quick Snack
- With Yogurt
- In Smoothie Bowls
- As a Post-Workout Treat
- How to Perfect Strawberry Cheesecake Protein Balls
- Best Side Dishes for Strawberry Cheesecake Protein Balls
- Common Mistakes to Avoid
- Storage & Reheating Instructions
- Refrigerator Storage
- Freezing Strawberry Cheesecake Protein Balls
- Reheating Strawberry Cheesecake Protein Balls
- Frequently Asked Questions
- Can I customize Strawberry Cheesecake Protein Balls?
- How do I know if my protein balls are too dry?
- How long do Strawberry Cheesecake Protein Balls last?
- Are Strawberry Cheesecake Protein Balls gluten-free?
- Can I use fresh strawberries instead of freeze-dried?
- Final Thoughts
- 📖 Recipe Card
Why You’ll Love This Recipe
- Health-Conscious Snack: These protein balls are a nutritious option that satisfies cravings without compromising your diet.
- No Baking Required: Enjoy the simplicity of a no-bake recipe that takes minimal time and effort to prepare.
- Versatile Flavor: With the rich taste of strawberries and cream cheese, these treats are sure to please everyone’s palate.
- Easy to Make: With just a few steps, you can whip up these delicious snacks in no time.
- Meal Prep Friendly: Store them easily in the fridge or freezer for on-the-go energy throughout the week.
Tools and Preparation
Before you start making your delicious Strawberry Cheesecake Protein Balls, gather the necessary tools. Having the right equipment will make your cooking process smoother and more enjoyable.
Essential Tools and Equipment
- Food processor
- Measuring cups
- Mixing bowl
- Cookie scoop or spoon
- Parchment paper
Importance of Each Tool
- Food processor: Essential for blending ingredients smoothly, ensuring the perfect dough consistency.
- Measuring cups: Accurate measurements are crucial for achieving the right balance of flavors and textures.
- Cookie scoop or spoon: Helps portion dough evenly, making it easy to form perfectly sized protein balls.
Ingredients
These Strawberry Cheesecake Protein Balls are a healthy, no-bake snack packed with protein, naturally sweetened, and bursting with creamy cheesecake flavor.
For the Base
- 1 cup rolled oats
- 4 oz softened cream cheese (full-fat or reduced-fat)
- 1/4 cup vanilla protein powder
- 1/4 cup almond flour
For Sweetness and Flavor
- 2 tablespoons honey or maple syrup
- 1 teaspoon vanilla extract
For Texture and Taste
- 1/2 cup freeze-dried strawberries (crushed into a fine powder)
- Optional: chia seeds or mini white chocolate chips
How to Make Strawberry Cheesecake Protein Balls
Step 1: Prepare Ingredients
Start by softening the cream cheese. Measure out all other ingredients. Crush the freeze-dried strawberries into a fine powder using either a food processor or by placing them in a zip-top bag and crushing them with a rolling pin.
Step 2: Combine Ingredients
In a food processor, combine the oats, almond flour, protein powder, softened cream cheese, crushed strawberries, honey, and vanilla extract. Blend until a dough forms. It should stick together when pressed but not be overly sticky.
Step 3: Adjust Consistency
If the dough feels too dry, add a teaspoon of water or milk at a time until it comes together. If it’s too sticky, add more almond flour until you reach the desired consistency.
Step 4: Form Protein Balls
Use a cookie scoop or spoon to portion out the dough. Roll each portion between your palms to form balls about 1 inch in diameter.
Step 5: Chill
Place the protein balls on a parchment-lined tray and refrigerate for 30 minutes to set.
Step 6: Store
Transfer your finished protein balls to an airtight container. They can be kept in the fridge for up to 5 days or frozen for up to 3 months.
Enjoy these Strawberry Cheesecake Protein Balls as part of your healthy snacking routine!
How to Serve Strawberry Cheesecake Protein Balls
These Strawberry Cheesecake Protein Balls are versatile and can be enjoyed in various ways. Whether as a quick snack or part of a meal, these protein-packed bites will satisfy your cravings.
As a Quick Snack
- Perfect for on-the-go energy boosts between meals.
- Pair with a piece of fruit for an extra nutritional punch.
With Yogurt
- Crumble the protein balls over Greek yogurt for added texture and flavor.
- Drizzle some honey on top for extra sweetness.
In Smoothie Bowls
- Chop the protein balls into smaller pieces and sprinkle them over smoothie bowls.
- They add a delightful crunch and enhance the cheesecake flavor.
As a Post-Workout Treat
- Ideal for recovery after workouts thanks to their protein content.
- Enjoy them with a glass of almond milk or your favorite plant-based drink.
How to Perfect Strawberry Cheesecake Protein Balls
To create the best Strawberry Cheesecake Protein Balls, follow these simple tips for optimal texture and flavor.
- Use room temperature cream cheese: This helps the ingredients blend smoothly and creates a better consistency.
- Adjust sweetness level: Taste the mixture before rolling. Add more honey or maple syrup if you prefer it sweeter.
- Experiment with mix-ins: Consider adding nuts or seeds for extra crunch and nutrition.
- Chill before serving: Refrigerating them allows the flavors to meld and makes them easier to handle.
Best Side Dishes for Strawberry Cheesecake Protein Balls
Pairing side dishes with your Strawberry Cheesecake Protein Balls can enhance your snacking experience. Here are some great options to consider.
Fresh Fruit Salad
A colorful mix of seasonal fruits adds freshness and balances the richness of the protein balls.Vegetable Sticks with Hummus
Crunchy veggies like carrots, cucumbers, and bell peppers paired with hummus provide a satisfying contrast.Nut Butter Toast
Spread almond or peanut butter on whole-grain toast for added protein and healthy fats.Cottage Cheese Bowl
Top cottage cheese with berries or granola for a high-protein side that complements the cheesecake flavors.Granola Parfait
Layer granola, yogurt, and fresh strawberries for a deliciously crunchy side dish that matches well with the protein balls.Chocolate-Dipped Bananas
Freeze banana slices dipped in dairy-free chocolate for a sweet treat that pairs perfectly with cheesecake flavors.
Common Mistakes to Avoid
Avoiding common pitfalls can enhance your experience making Strawberry Cheesecake Protein Balls.
- Skipping the cream cheese softening: Failing to soften cream cheese can lead to a lumpy texture. Always let it sit at room temperature for 15-30 minutes before use.
- Not measuring ingredients precisely: Inaccurate measurements can affect the balance of flavors and texture. Use measuring cups and spoons for accuracy.
- Ignoring dough consistency: A dough that’s too dry or sticky will affect your ability to shape the balls. Adjust with water or almond flour as needed until you achieve the right consistency.
- Forgetting to refrigerate: Skipping the refrigeration step can result in protein balls that fall apart. Always chill them for at least 30 minutes before serving.
- Storing incorrectly: Improper storage can lead to spoilage or loss of flavor. Use airtight containers and keep them in the fridge or freezer as appropriate.

Storage & Reheating Instructions
Refrigerator Storage
- Store in an airtight container.
- Keep in the refrigerator for up to 5 days.
Freezing Strawberry Cheesecake Protein Balls
- Place in an airtight container or freezer bag.
- Can be frozen for up to 3 months.
Reheating Strawberry Cheesecake Protein Balls
- Oven: Preheat oven to 350°F (175°C). Warm for about 5-10 minutes until slightly soft.
- Microwave: Heat for about 10-15 seconds on a microwave-safe plate.
- Stovetop: Warm on low heat in a non-stick pan, turning occasionally for even heating.
Frequently Asked Questions
Here are some common questions about Strawberry Cheesecake Protein Balls.
Can I customize Strawberry Cheesecake Protein Balls?
Absolutely! You can add nuts, seeds, or different flavor extracts to personalize your protein balls.
How do I know if my protein balls are too dry?
If they crumble when shaped, they may need a bit more moisture. Add water or milk gradually until they hold together better.
How long do Strawberry Cheesecake Protein Balls last?
They can last up to 5 days in the refrigerator and up to 3 months if frozen properly.
Are Strawberry Cheesecake Protein Balls gluten-free?
Yes, using rolled oats and almond flour ensures that these protein balls are gluten-free.
Can I use fresh strawberries instead of freeze-dried?
Fresh strawberries will change the texture and moisture of the mixture. If you choose fresh, reduce other liquids accordingly.
Final Thoughts
Strawberry Cheesecake Protein Balls make a delightful snack that’s both nutritious and satisfying. Their creamy cheesecake flavor combined with fruity sweetness is sure to please everyone. Feel free to customize with your favorite mix-ins or toppings, making these no-bake bites a versatile addition to your healthy snacking repertoire.
Did You Enjoy Making This Recipe? Please rate this recipe with ⭐⭐⭐⭐⭐ or leave a comment.
📖 Recipe Card
Print
Strawberry Cheesecake Protein Balls
- Total Time: 15 minutes
- Yield: About 12 servings 1x
Description
Indulge in the delightful taste of Strawberry Cheesecake Protein Balls, the perfect no-bake snack to satisfy your sweet cravings while fueling your body. Bursting with the creamy goodness of cheesecake and the natural sweetness of strawberries, these protein-packed bites are an ideal choice for a quick post-workout treat or a nutritious afternoon snack. With minimal preparation time, you can whip up these energy balls in just a few simple steps, making them convenient for busy lifestyles. Plus, they are gluten-free and can be easily stored in your fridge or freezer for on-the-go snacking.
Ingredients
- 1 cup rolled oats
- 4 oz softened cream cheese
- 1/4 cup vanilla protein powder
- 1/4 cup almond flour
- 2 tablespoons honey or maple syrup
- 1 teaspoon vanilla extract
- 1/2 cup freeze-dried strawberries (crushed)
Instructions
- Prepare the cream cheese by softening it at room temperature. Crush the freeze-dried strawberries into a fine powder using a food processor or rolling pin.
- In a food processor, combine rolled oats, almond flour, protein powder, softened cream cheese, crushed strawberries, honey, and vanilla extract. Blend until the mixture forms a cohesive dough.
- Adjust consistency as needed by adding water or more almond flour.
- Roll the dough into 1-inch balls using your hands or a cookie scoop.
- Place protein balls on a parchment-lined tray and refrigerate for at least 30 minutes to set.
- Prep Time: 15 minutes
- Cook Time: 0 minutes
- Category: Snack
- Method: No-Bake
- Cuisine: American
Nutrition
- Serving Size: 1 protein ball (30g)
- Calories: 100
- Sugar: 5g
- Sodium: 50mg
- Fat: 4g
- Saturated Fat: 2g
- Unsaturated Fat: 2g
- Trans Fat: 0g
- Carbohydrates: 12g
- Fiber: 2g
- Protein: 3g
- Cholesterol: 10mg